
در این آموزش میخواهیم آیتمهای لیست SharePoint را در SPFX نمایش دهیم.
برای نمایش آیتمهای لیست SharePoint در SPFX، ابتدا باید SPFx client side web part را ایجاد کنیم. ( ایجاد SPFx client side web part)
مرحله ۱: Node.js command prompt را باز کنید و یک پروژه جدید مشابه تصویر زیر ایجاد کنید.
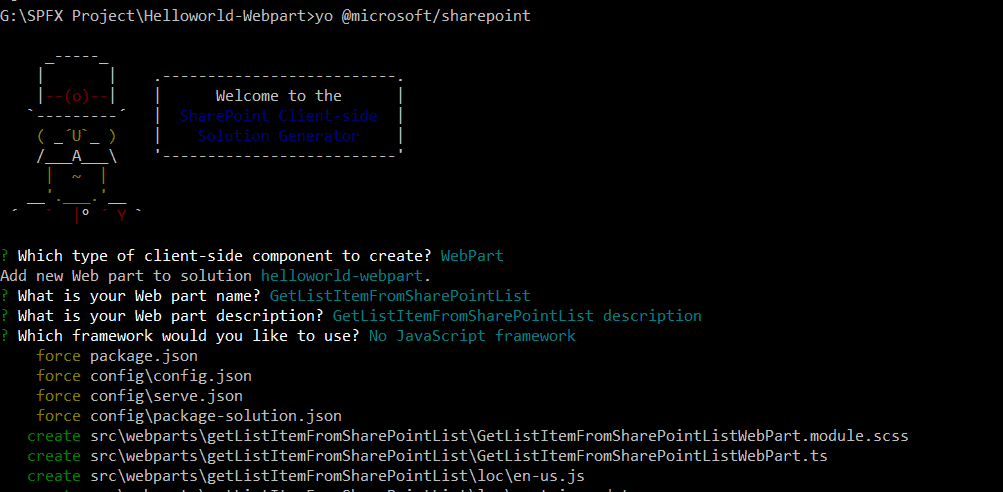
مرحله ۲: در این قسمت من یک Web Part به نام GetListItemFromSharePointList ایجاد کردهام و از No JavaScript به عنوان چارچوب استفاده کردهام.
پس از اجرای دستور بالا، Web Part جدید ما با موفقیت در پوشه solution ایجاد شد. حالا کد را در command prompt تایپ کنید تا این پروژه در Visual Studio code باز شود.
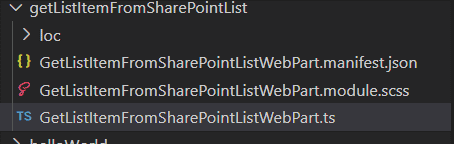
اکنون می توانید screenshot زیر را مشاهده کنید که در آن web part جدید با موفقیت ایجاد شده است و راه حل به شکل زیر است.
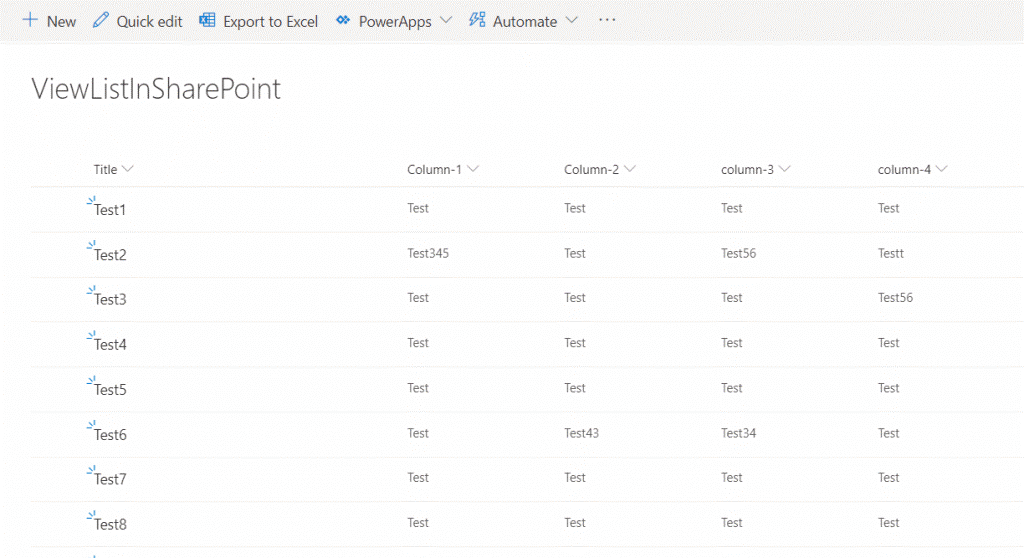
مرحله ۳: بعد من یک لیست در SharePoint مانند تصویر زیر ایجاد کرده ام.
مرحله ۴: سپس GetListItemFromSharePointListWebPart.ts را باز کرده و کد زیر را جایگزین کنید.
import { Version } from '@microsoft/sp-core-library';
import {
IPropertyPaneConfiguration,
PropertyPaneTextField
} from '@microsoft/sp-property-pane';
import { BaseClientSideWebPart } from '@microsoft/sp-webpart-base';
import { escape } from '@microsoft/sp-lodash-subset';
import styles from './GetListItemFromSharePointListWebPart.module.scss';
import * as strings from 'GetListItemFromSharePointListWebPartStrings';
import {
SPHttpClient,
SPHttpClientResponse
} from '@microsoft/sp-http';
import {
Environment,
EnvironmentType
} from '@microsoft/sp-core-library';
export interface IGetListItemFromSharePointListWebPartProps {
description: string;
}
export interface ISPLists
{
value: ISPList[];
}
export interface ISPList
{
Title: string;
Column_x002d_1: string;
Column_x002d_2 :string;
column_x002d_3: string;
column_x002d_4 :string;
column_x002d_5: string;
Date :string;
}
export default class GetListItemFromSharePointListWebPart extends BaseClientSideWebPart <IGetListItemFromSharePointListWebPartProps> {
private _getListData(): Promise<ISPLists>
{
return this.context.spHttpClient.get(this.context.pageContext.web.absoluteUrl + "/_api/web/lists/GetByTitle('ViewListInSharePoint')/Items",SPHttpClient.configurations.v1)
.then((response: SPHttpClientResponse) =>
{
return response.json();
});
}
private _renderListAsync(): void
{
if (Environment.type == EnvironmentType.SharePoint ||
Environment.type == EnvironmentType.ClassicSharePoint) {
this._getListData()
.then((response) => {
this._renderList(response.value);
});
}
}
private _renderList(items: ISPList[]): void
{
let html: string = '<table border=2 width=100% style="font-family: "Trebuchet MS", Arial, Helvetica, sans-serif;">';
html += '<b><th style="background-color: #af534c;" >Title</th> <th style="background-color: #af534c;">Column-1 </th><th style="background-color: #af534c;">Column-2 </th><th style="background-color: #af534c;">Column-3 </th><th style="background-color: #af534c;">Column-4 </th><th style="background-color: #af534c;">Column-5 </th><th style="background-color: #af534c;">Date</th></b>';
items.forEach((item: ISPList) => {
html += `
<tr>
<td>${item.Title}</td>
<td>${item.Column_x002d_1}</td>
<td>${item.Column_x002d_2}</td>
<td>${item.column_x002d_3}</td>
<td>${item.column_x002d_4}</td>
<td>${item.column_x002d_5}</td>
<td>${item.Date}</td>
</tr>
`;
});
html += '</table>';
const listContainer: Element = this.domElement.querySelector('#BindspListItems');
listContainer.innerHTML = html;
}
public render(): void {
this.domElement.innerHTML = `
<div class="${ styles.getListItemFromSharePointList }">
<div class="${ styles.container }">
<div class="${ styles.row }">
<div class="${ styles.column }">
<span class="${ styles.title }">Get Data from SharePoint List Using SPFX </span>
</div>
<br/>
<br/>
<br/>
<div id="BindspListItems" />
</div>
</div>
</div>`;
this._renderListAsync();
}
protected get dataVersion(): Version {
return Version.parse('1.0');
}
protected getPropertyPaneConfiguration(): IPropertyPaneConfiguration {
return {
pages: [
{
header: {
description: strings.PropertyPaneDescription
},
groups: [
{
groupName: strings.BasicGroupName,
groupFields: [
PropertyPaneTextField('description', {
label: strings.DescriptionFieldLabel
})
]
}
]
}
]
};
}
}
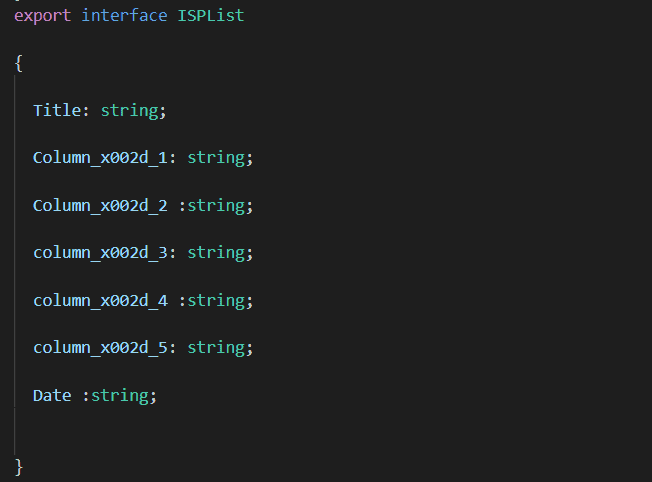
مرحله ۵: در کد بالا، قسمتی وجود دارد که در آن نام همه ستونها را مشابه تصویر زیر مشخص می کنیم. من در لیست خود، از 7 ستون زیر برای نشان دادن موارد مورد نظر خود در یک جدول HTML استفاده کرده ام.
مرحله ۶: در این بخش، من با استفاده از REST API لیست را فراخوانی کردهام. شما باید نام لیست خود را در این URL وارد کنید.
همچنین می توانید فیلترهای بیشتری مانند سفارشها، علاقمندیها یا انتخابها در این بخش اضافه کنید.

مرحله ۷: در این بخش، من یک سربرگ Table ایجاد کردهام که ستونها را با td در جدول متصل کرده و در نهایت با DIV id متصل می شود که دادهها را رندر می کند.
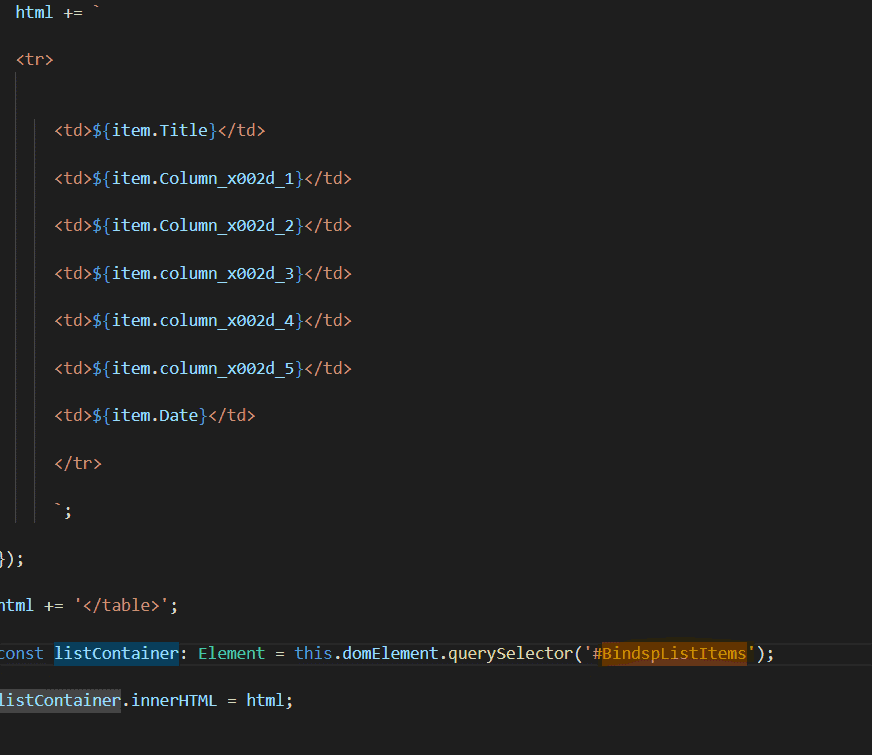
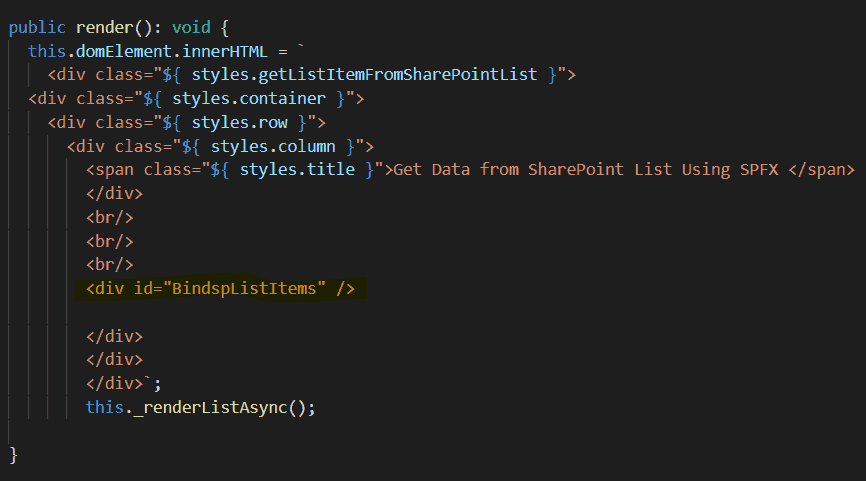
مرحله ۸: در این بخش، من یک Div را اضافه کرده و محتوای HTML خود را در اینجا به نمایش گذاشتهام.
مرحله ۹: سپس به command prompt رفته و این کد را با استفاده از دستور زیر اجرا کنید.
- gulp clean
- gulp build
- gulp serve
- gulp bundle –ship
- gulp package-solution -ship
بنابراین می توانید دستور بالا را به ترتیب اجرا کنید. هنگامیکه روی gulp serve کلیک کنید، صفحه جدیدی باز میشود که باید Web Part جدیدی را که اضافه کردهاید اضافه کنید.
پس از افزودن SPFx web part جدید ، صفحه خالی به نظر می رسد. نتیجه پس از افزودن این بخش وب به سایت SharePoint Online شما حاصل می شود.
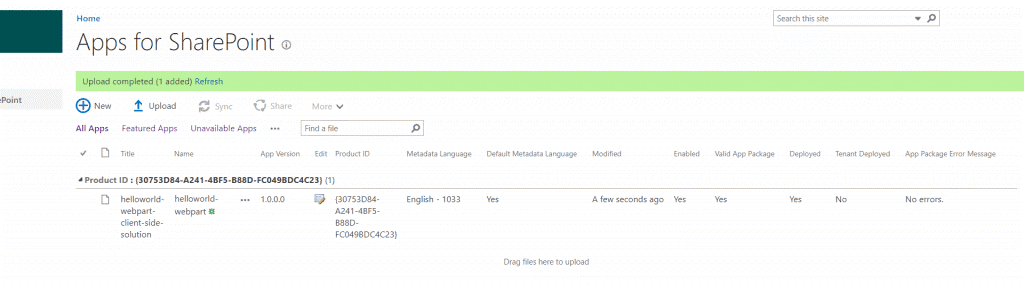
مرحله ۱۰: کار بعدی که باید انجام دهیم، آمادهسازی پکیج و بارگذاری پکیج در سایت SharePoint Catalog App است. ما باید پکیج را با استفاده از دستور مرحله 8 آماده کنیم. پس از ایجاد پکیج، باید آن را در سایت فهرست برنامه که همان تصویر زیر است بارگذاری کنیم.
مرحله ۱۱: پس از افزودن Web part خود در صفحه، خروجی مانند تصویر زیر خواهد بود.
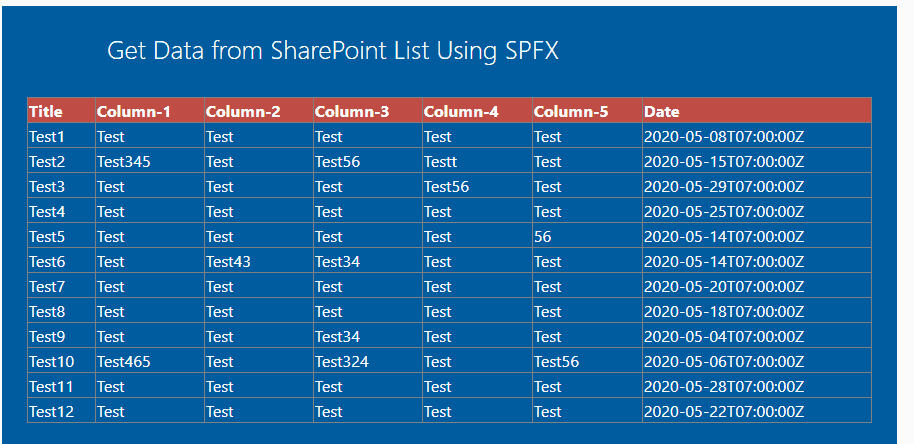
در این آموزش، ما نحوه نمایش آیتمهای لیست SharePoint در یک جدول با استفاده از Web part سمت سرویس گیرنده SPFx را یاد گرفتیم.
مطالب مرتبط


آخرین دیدگاهها
چگونه امتیاز دهی به یک فایل را در SharePoint فعال کنیم؟
امیرحسین غلامیانتغییر عرض نمایش ستون ها
Fletch Skinnerتغییر عرض نمایش ستون ها
Chauffina CarrID Outcome ها در Flexi task
Fletch Skinner